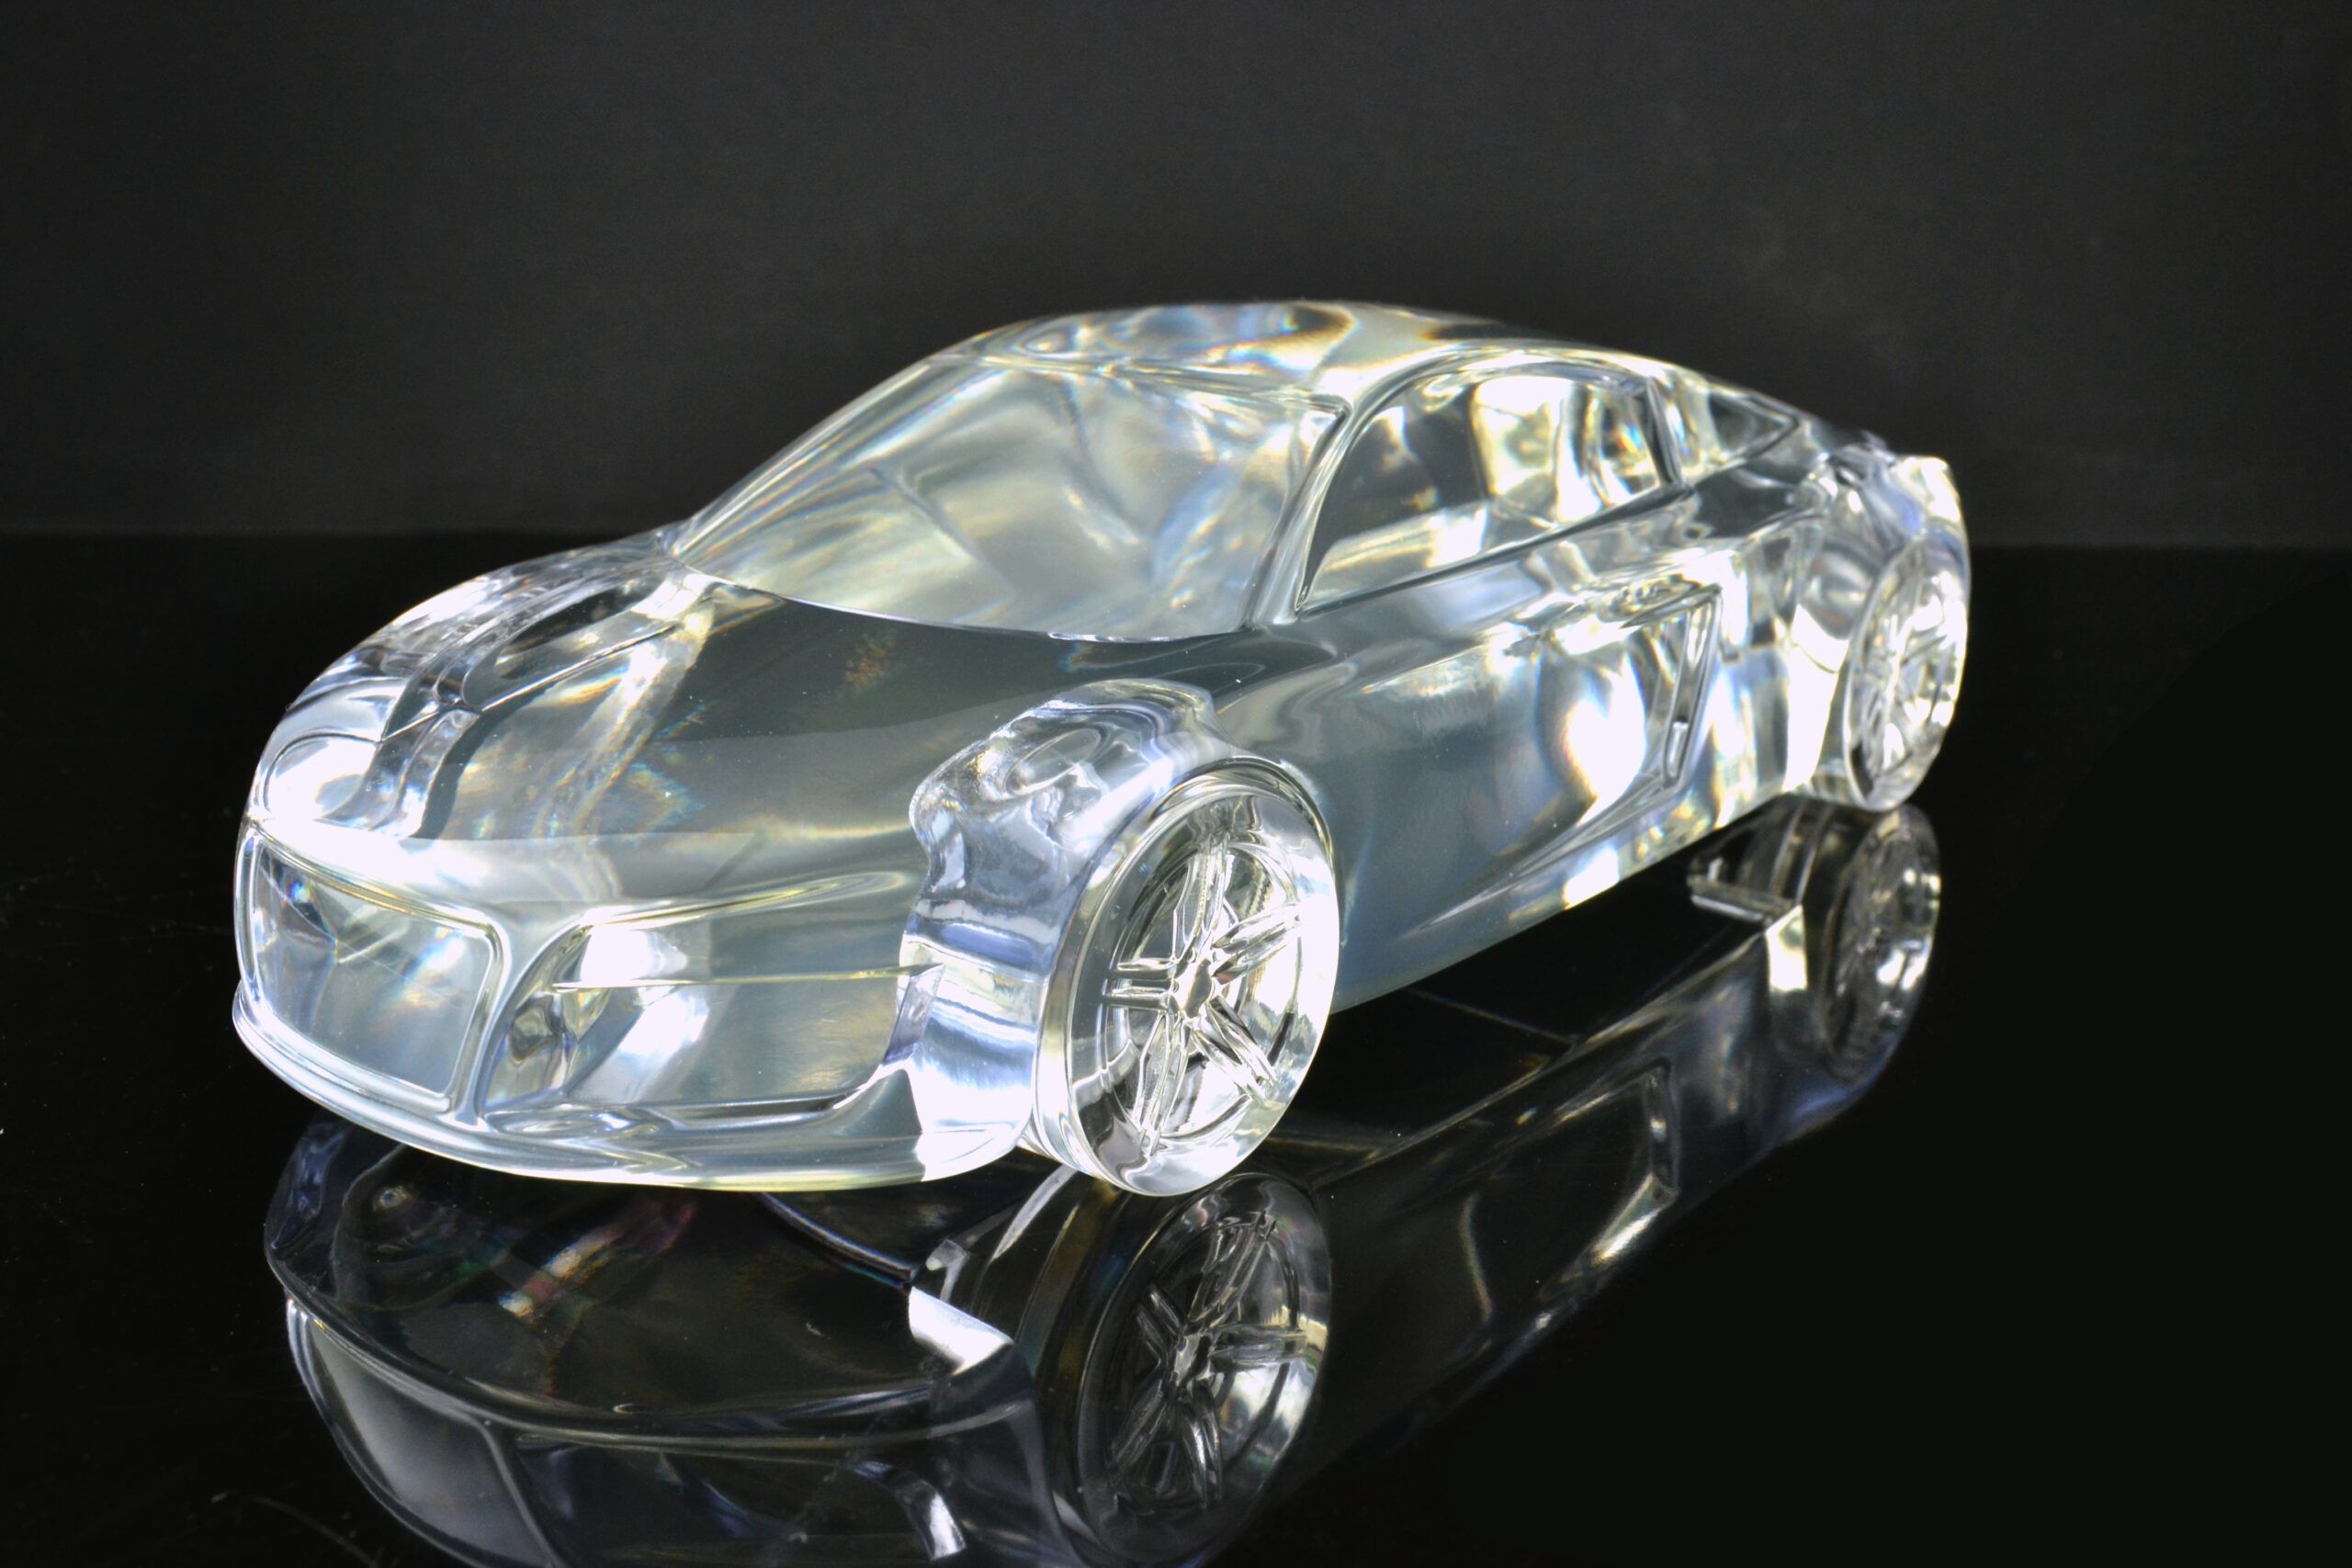
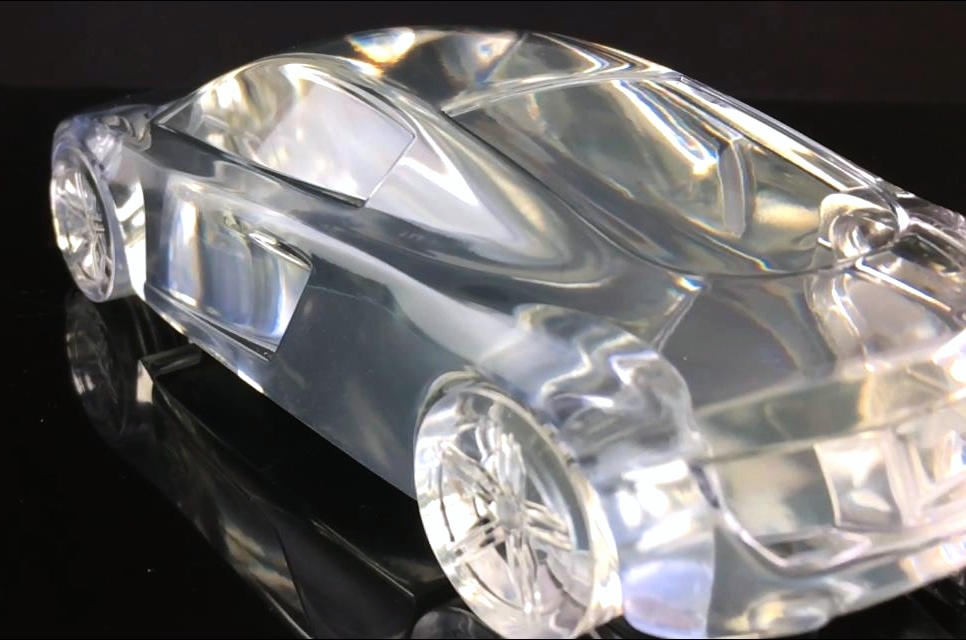
3D Printed CLEAR CAR

3d printed clear car

3D Printed Car Model

1/10 Scale Automotive Mockup – High-Quality Transparent Model

Characteristics

An astonishingly clear transparent model has been realized by minimizing internal air bubbles as much as possible.

Thanks to 3D printing technology, we are able to offer ultra-short lead times, even for urgent requests.

If you suddenly need an additional exhibit for an in-house exhibition, event, or presentation, please feel free to contact us.

Production Process

① Detailed Consultation

We begin with a detailed discussion based on your intended use and specifications.

Meetings can be conducted either in person at your site or via online tools such as Zoom.

Depending on your requirements, we can also provide sample parts and conduct basic compatibility checks for chemicals or fluids used in your application.

② Submission of 3D Data

You provide us with your 3D CAD data for production.

③ Creation of 3D Printing Programs (Our Core Know-How)

We carefully plan how the product will be built layer by layer.

By combining various 3D printing parameters and conditions, we create a dedicated printing program using specialized software to achieve optimal results.

④ 3D Printing

UV laser light is selectively applied to the resin, and the shape is formed through repeated layering.

The minimum layer thickness is 0.05 mm, although 0.1–0.15 mm is commonly used.

Finer layers result in a smoother surface but require longer printing time, so achieving the right balance is essential.

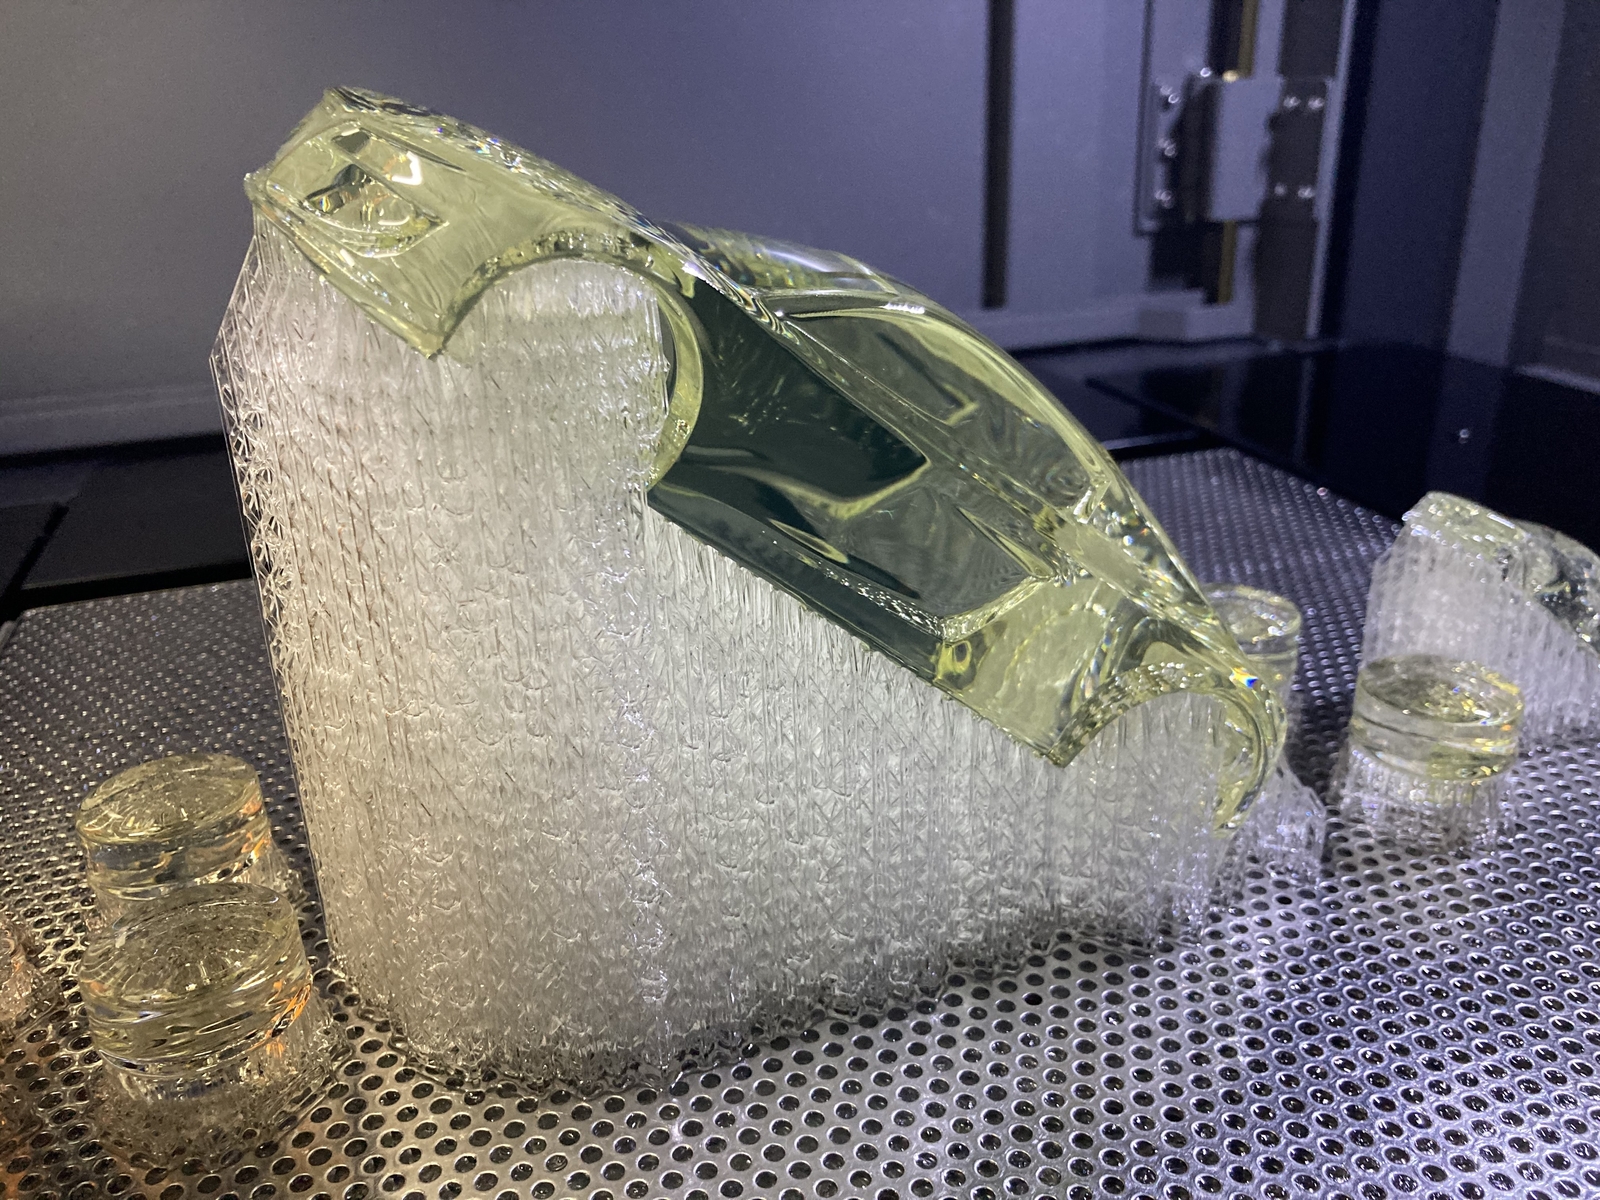
⑤ Completion of 3D Printing

Support structures are added during printing to maintain the shape.

After printing, the part is washed and unnecessary support structures are carefully removed.
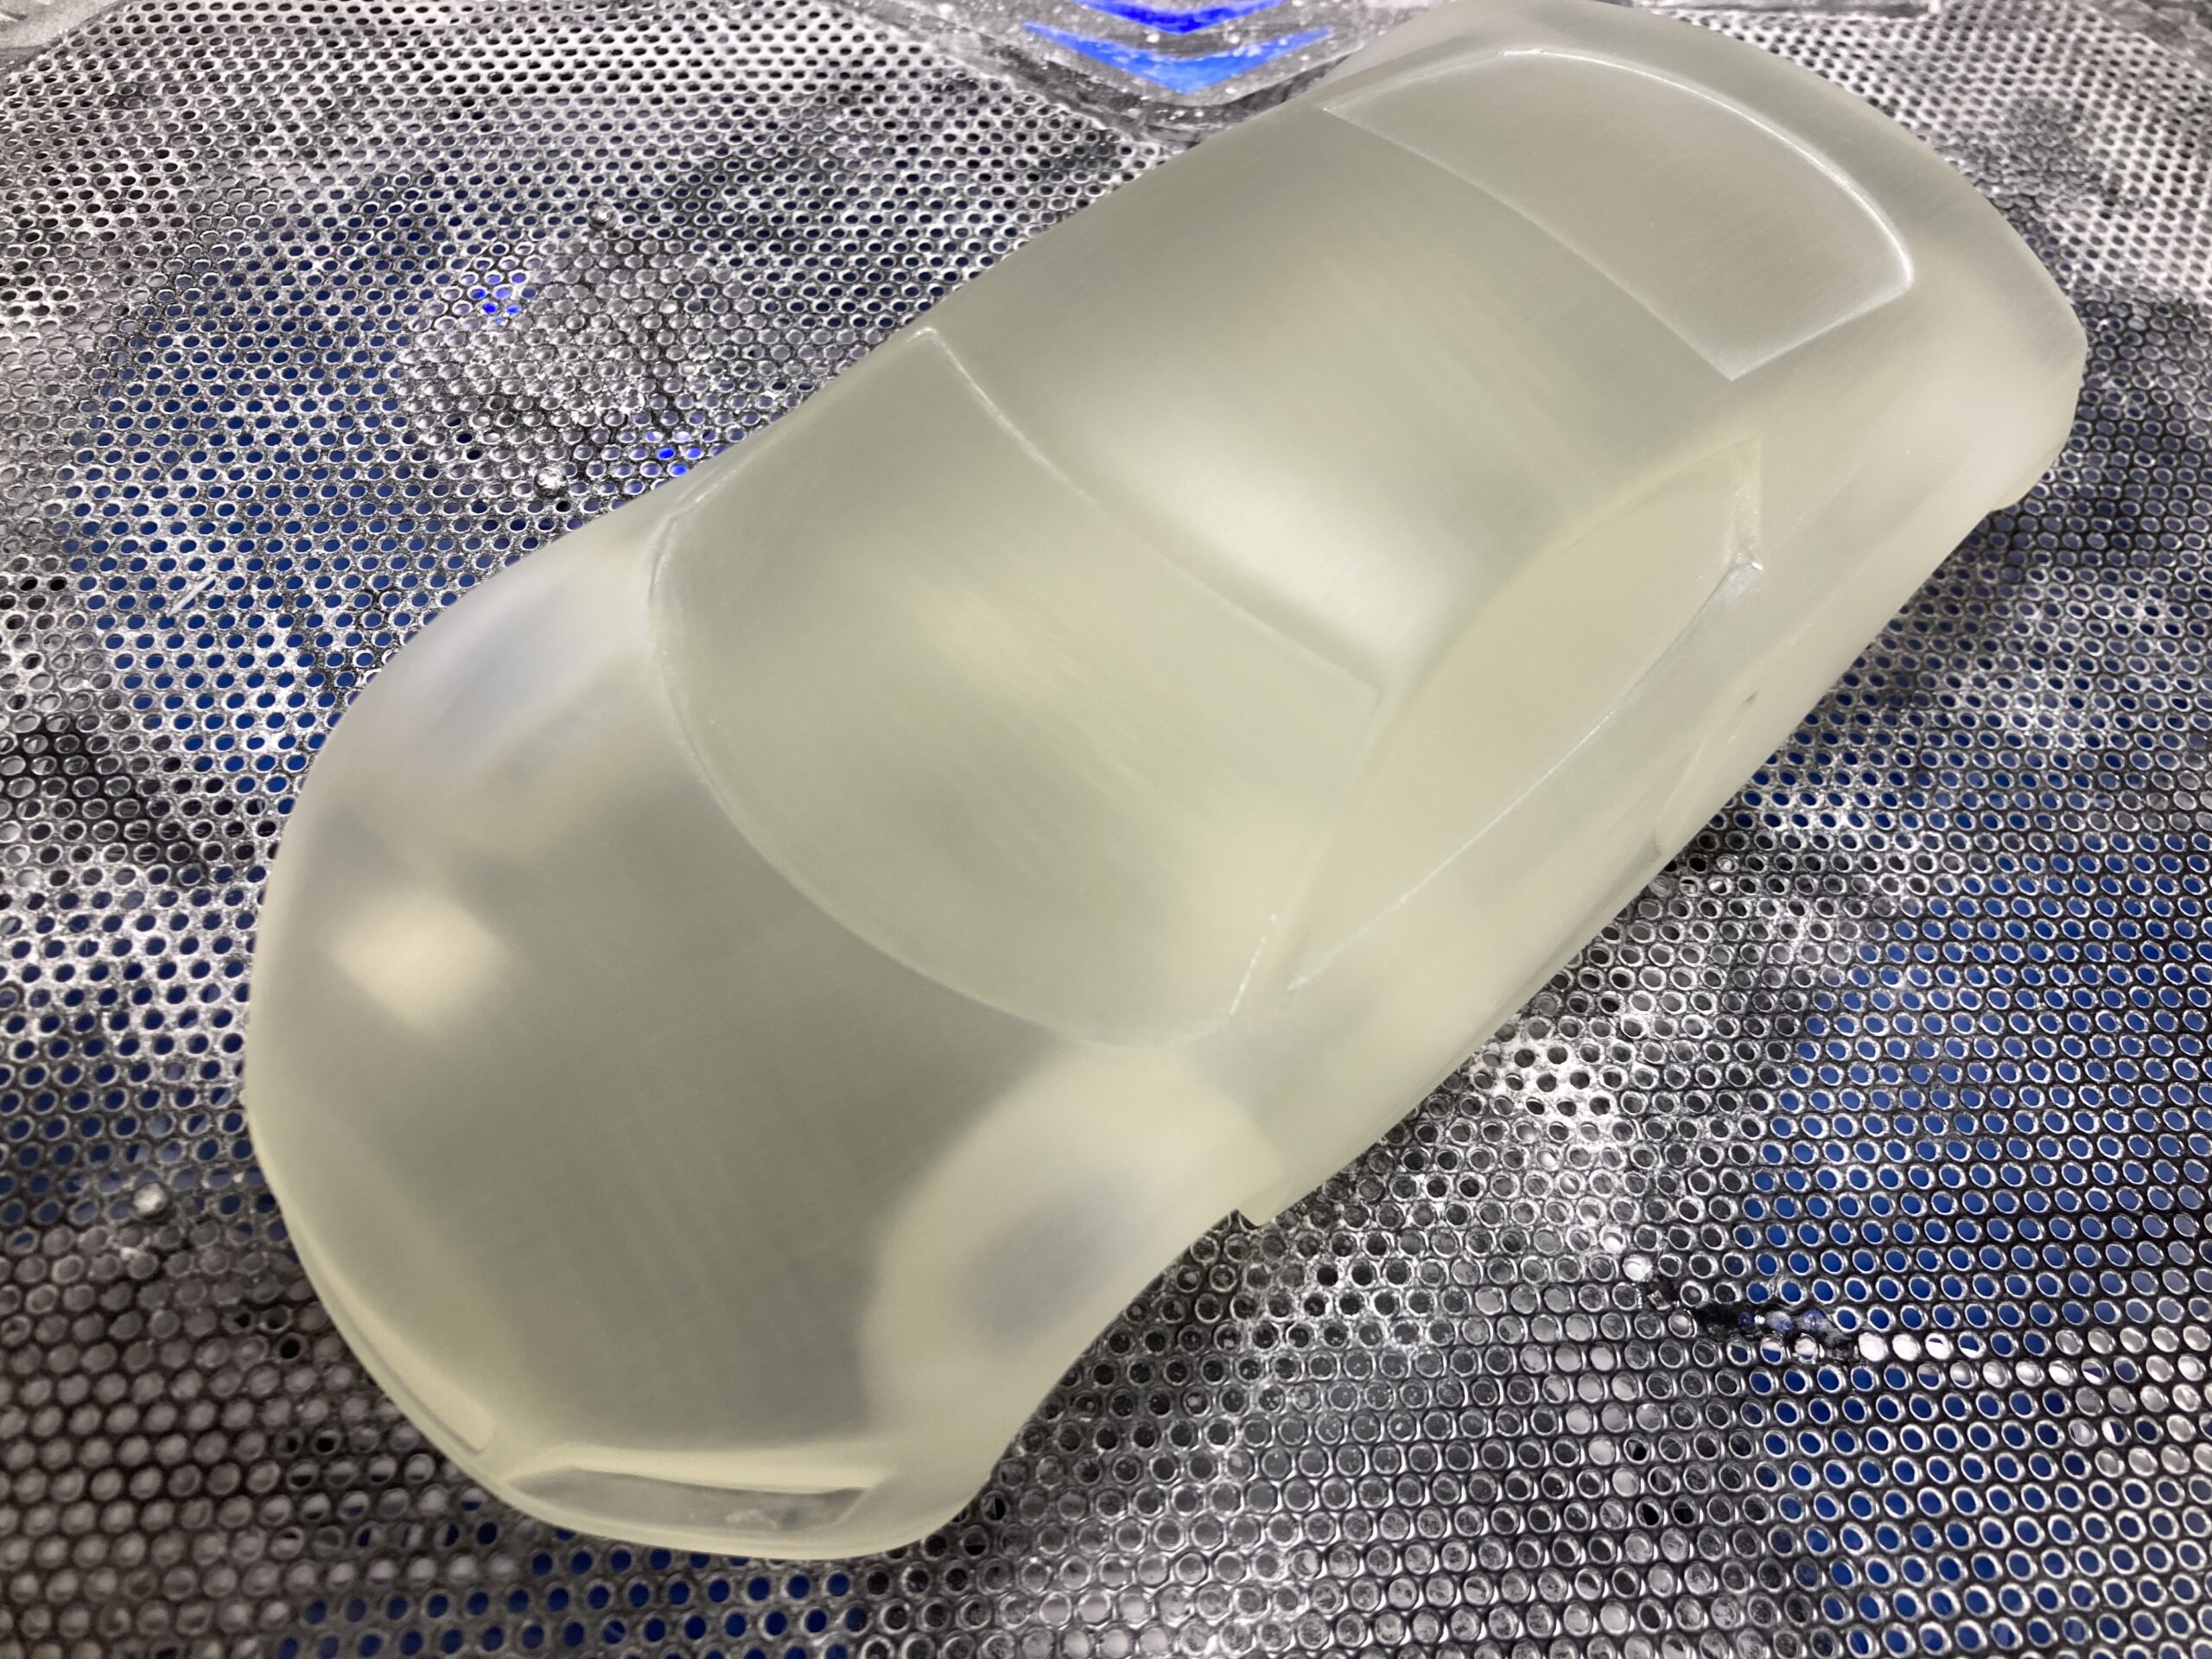
⑥ Surface Finishing

Layer lines are removed by hand finishing to create a smooth surface.

If transparency is not required, the product can be delivered at this stage.

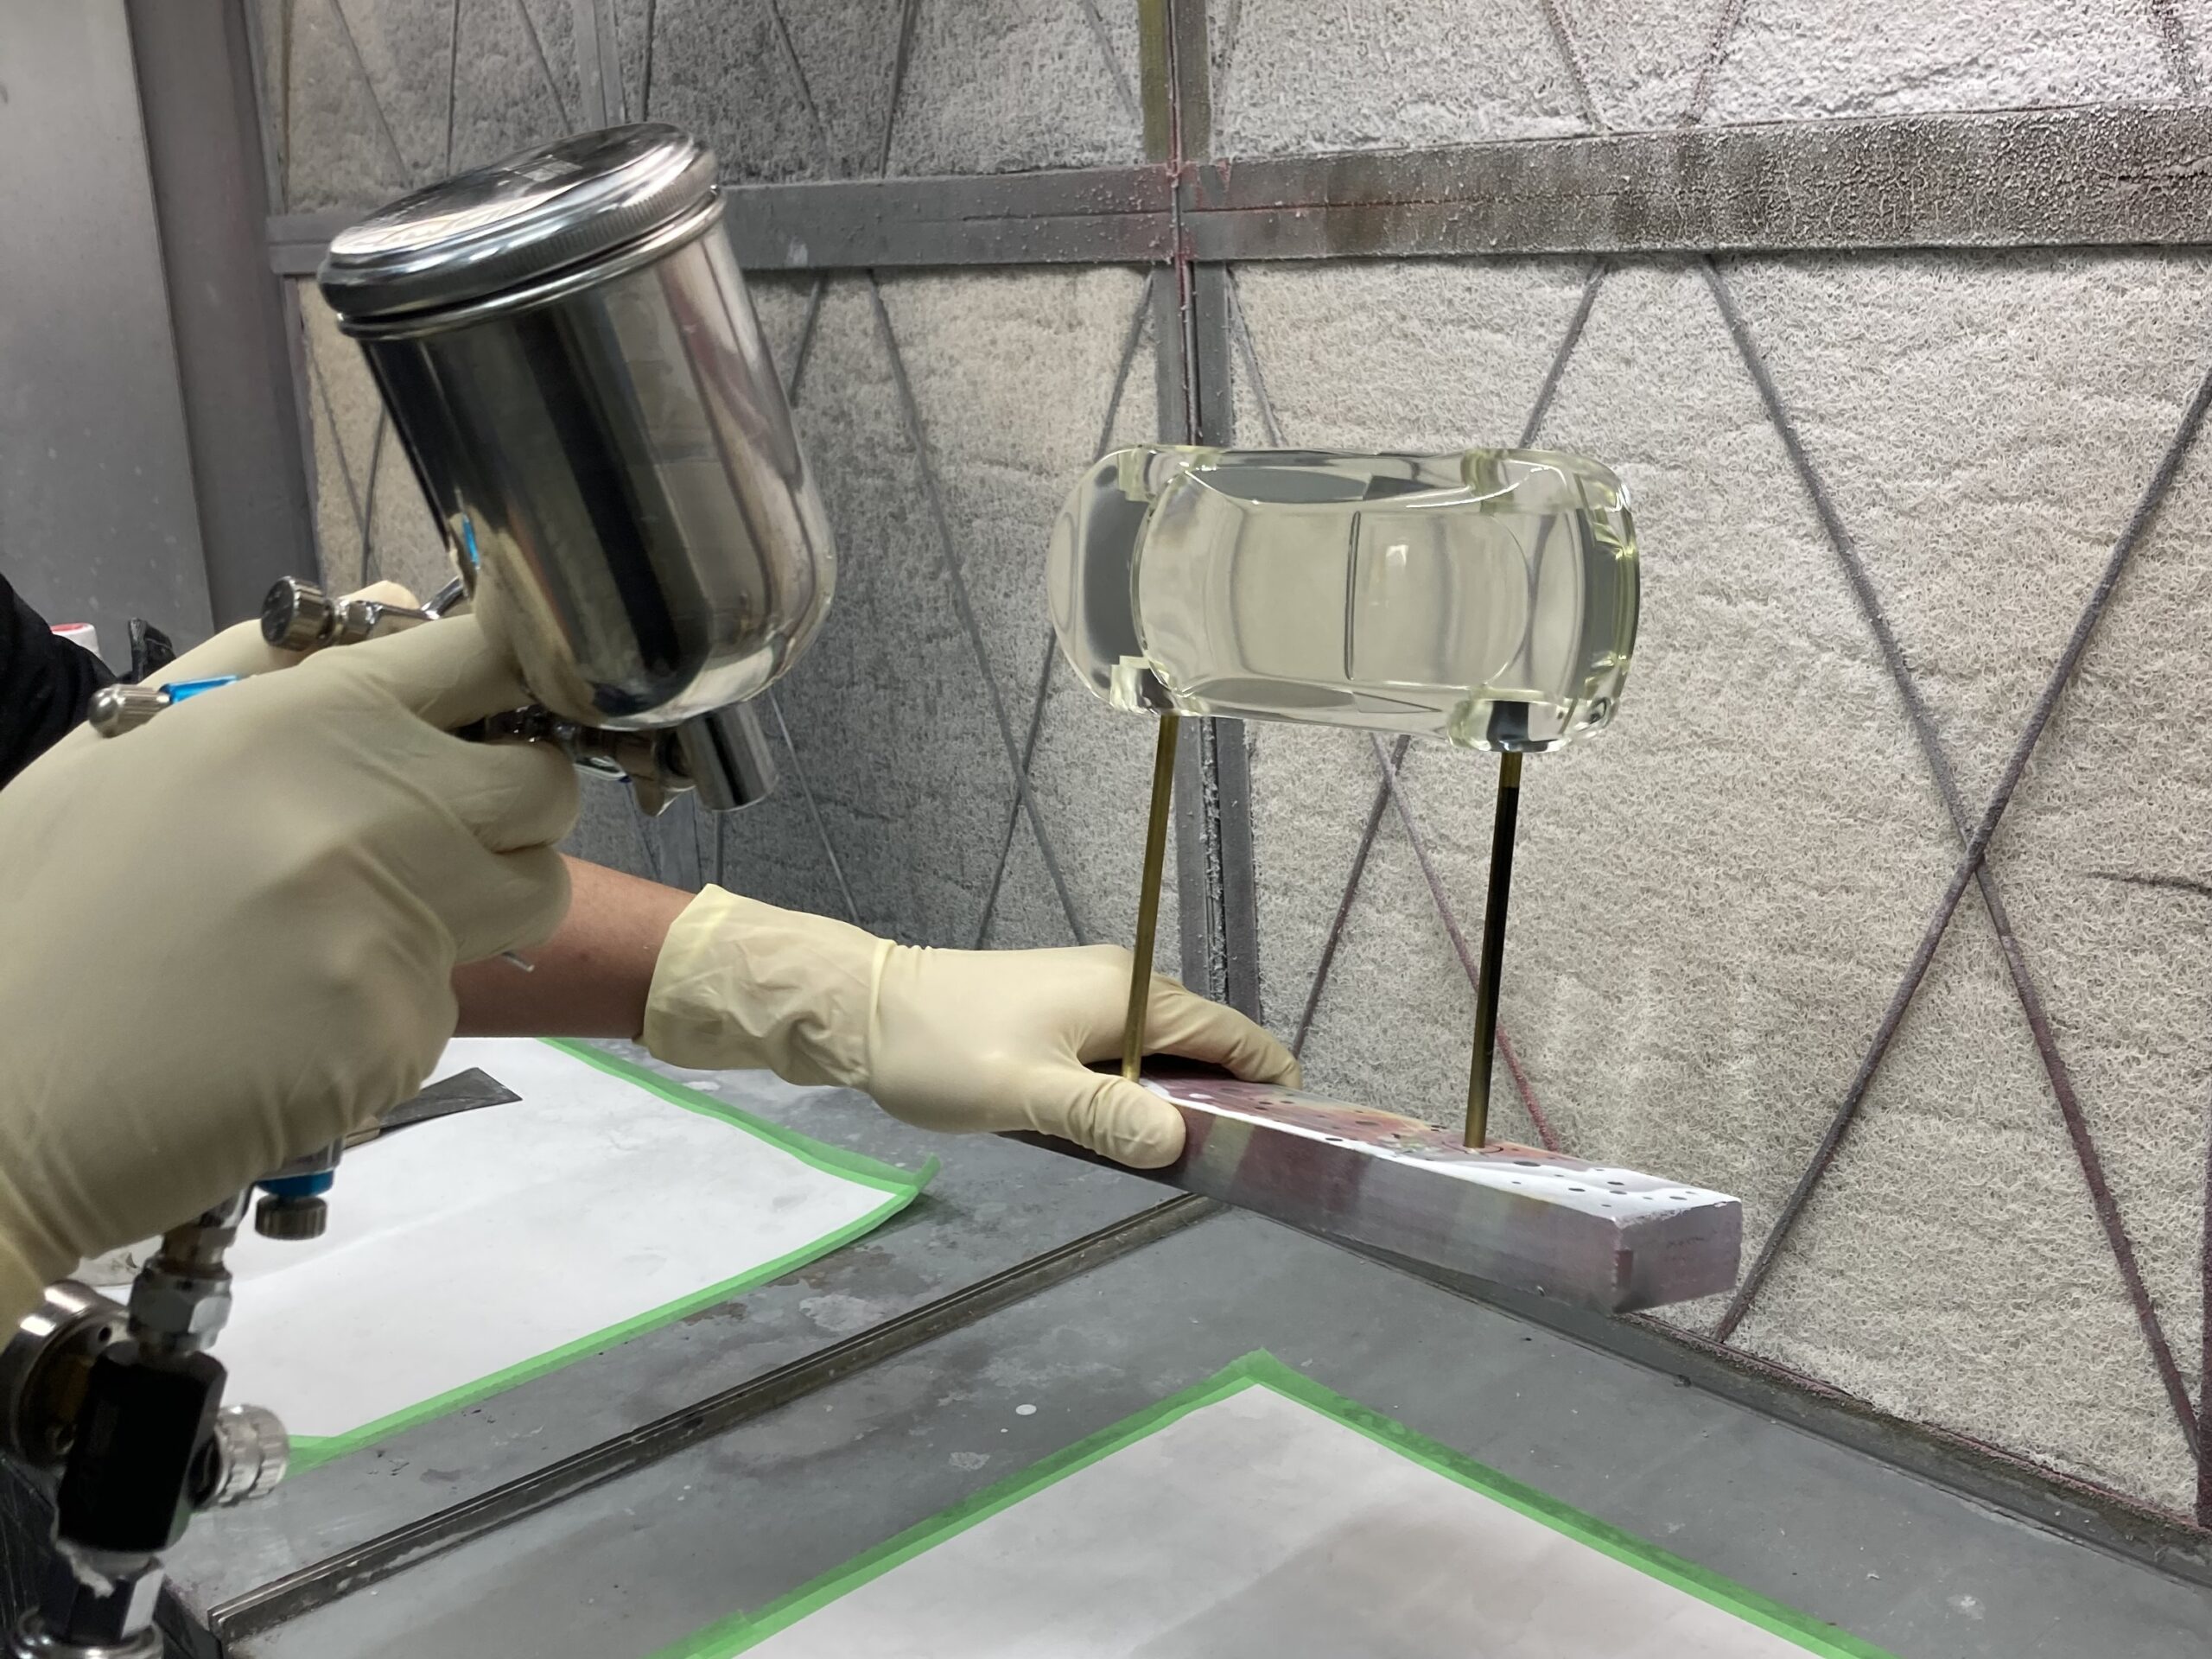
⑦ Clear Finish (Final Product)

A clear coating is applied to achieve a clean, highly transparent final appearance, completing the process.

 
Characteristics

Material: TSR 829 (Moisture-resistant highly transparent materials)

Size: 1.18 × 2.36 × 0.59 inches (diameter:φ0.0094 inches)

Please feel free to contact us.
Adequate support will be provided by our experienced designers until prototype completion.

Close Up

3D Printing  in progress

Polishing

Clear Coating

STEP5: Quality Assurance and Precision Inspection

A quality inspection is performed. At INAC, where quality comes first, we use CMMs, gauges, and other equipment for precision checks.

STEP4: Post-Processing and Finishing

Finishing is done by removing the supports, polishing, and applying transparency treatment. It is also possible to paint and apply plating to the formed product.

STEP3: UV-Laser Print Formation (SLA Process)

Output: The product is formed by irradiating the liquid with a laser beam of UV light and laminating it. The conditions of the external environment, such as room temperature and humidity, must be maintained.

STEP2: Model Program Generation and Support Adjustment

A program for model formation is created. Depending on the shape, it may be necessary to adjust the degree of tilt and the position of the supports.

STEP1: CAD File Submission

Upload your CAD to our online quoting platform.

STEP 3: Rendering and Scene Integration

We can also handle exterior modeling and interior structure design based on illustrations. After creating the 3D models, we can create a rendering to fit a scene. We can deliver images even if we do not proceed with production.

STEP 2: Detailed Design and 3D Modeling

Once the design is determined, drawings and 3D models will be created. The structure will be examined, taking into consideration not only the external design but also functionalities such as mating and sliding.

STEP 1: Initial Design Consultation

The first step is a meeting to discuss the project. Drawings are not required for this meeting. We will create a design from a sketch based on the overall image and concept that you have in mind.

STEP5: Quality Assurance and Inspection

We perform quality inspections. At INAC, where quality comes first, we use CMMs, gauges, and other equipment for precision checks.

STEP4: Post-Casting Finishing

Vacuum casting materials are cured and then taken out of the silicone rubber mold. Then we perform finishing such as deburring and gating, and they are made into finish products.

STEP3:Material Injuction

Liquid casting material is injected into the silicone rubber mold in a vacuum environment. 

STEP2: Mold Preparation

The silicone mold is cut open into a male and female mold, and the master model is removed.

STEP1: Mold Creation

The master model is fixed to a wooden frame and silicone is poured to create a mold.