Bringing Concepts to Life: Ultra-Realistic Functional Prototypes with Mass-Production Quality
Pursuing the Reality of Mass-Produced Goods
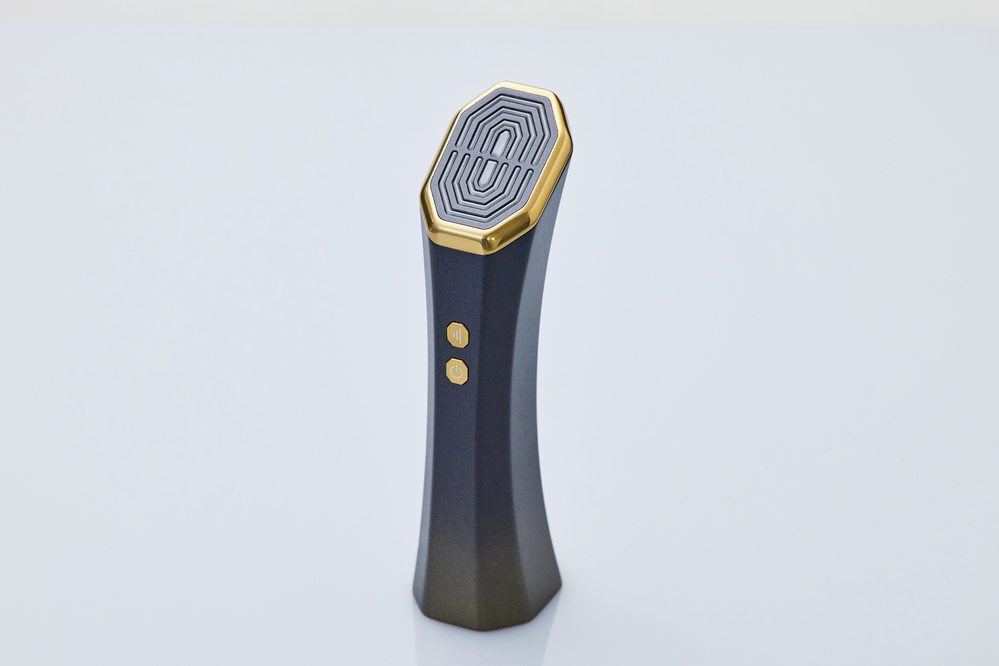
Equipped with functional LEDs and buttons to toggle modes and intensity levels, our prototypes deliver a user experience identical to the final product. Precision screen printing on icons (such as power symbols) ensures a finish indistinguishable from mass-produced units.
Seamless Integration from Design to Production
Based on initial sketches and concepts, we execute structural housing design with internal components in mind. By integrating the entire process—from modeling and CNC machining to advanced painting—we achieve a perfect balance of aesthetic beauty and functional performance.
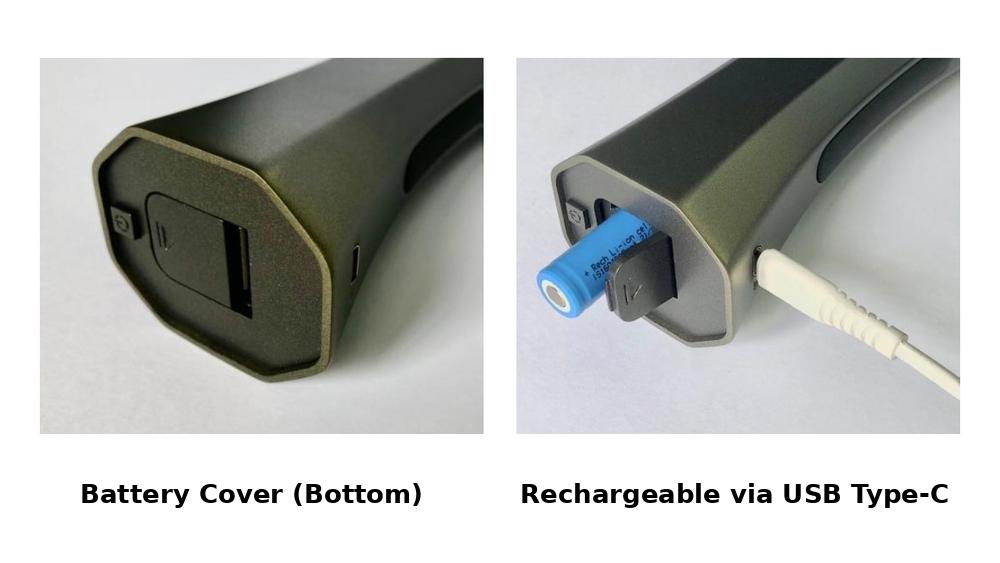
Power Versatility
The unit supports both rechargeable and non-rechargeable batteries and features a USB Type-C charging port.
Materials & Finishies
Body: ABS, Acrylic with Gradient Painting
LED Frame: Aluminum with Painting
Grip: ABS with PU Coating
Lead Time
Design & CAD Engineering: Approx. 2 weeks
Housing Fabrication: Approx. 2 weeks (We transform conceptual ideas into “tangible, functional hardware” in just one month.)
Key Highlight
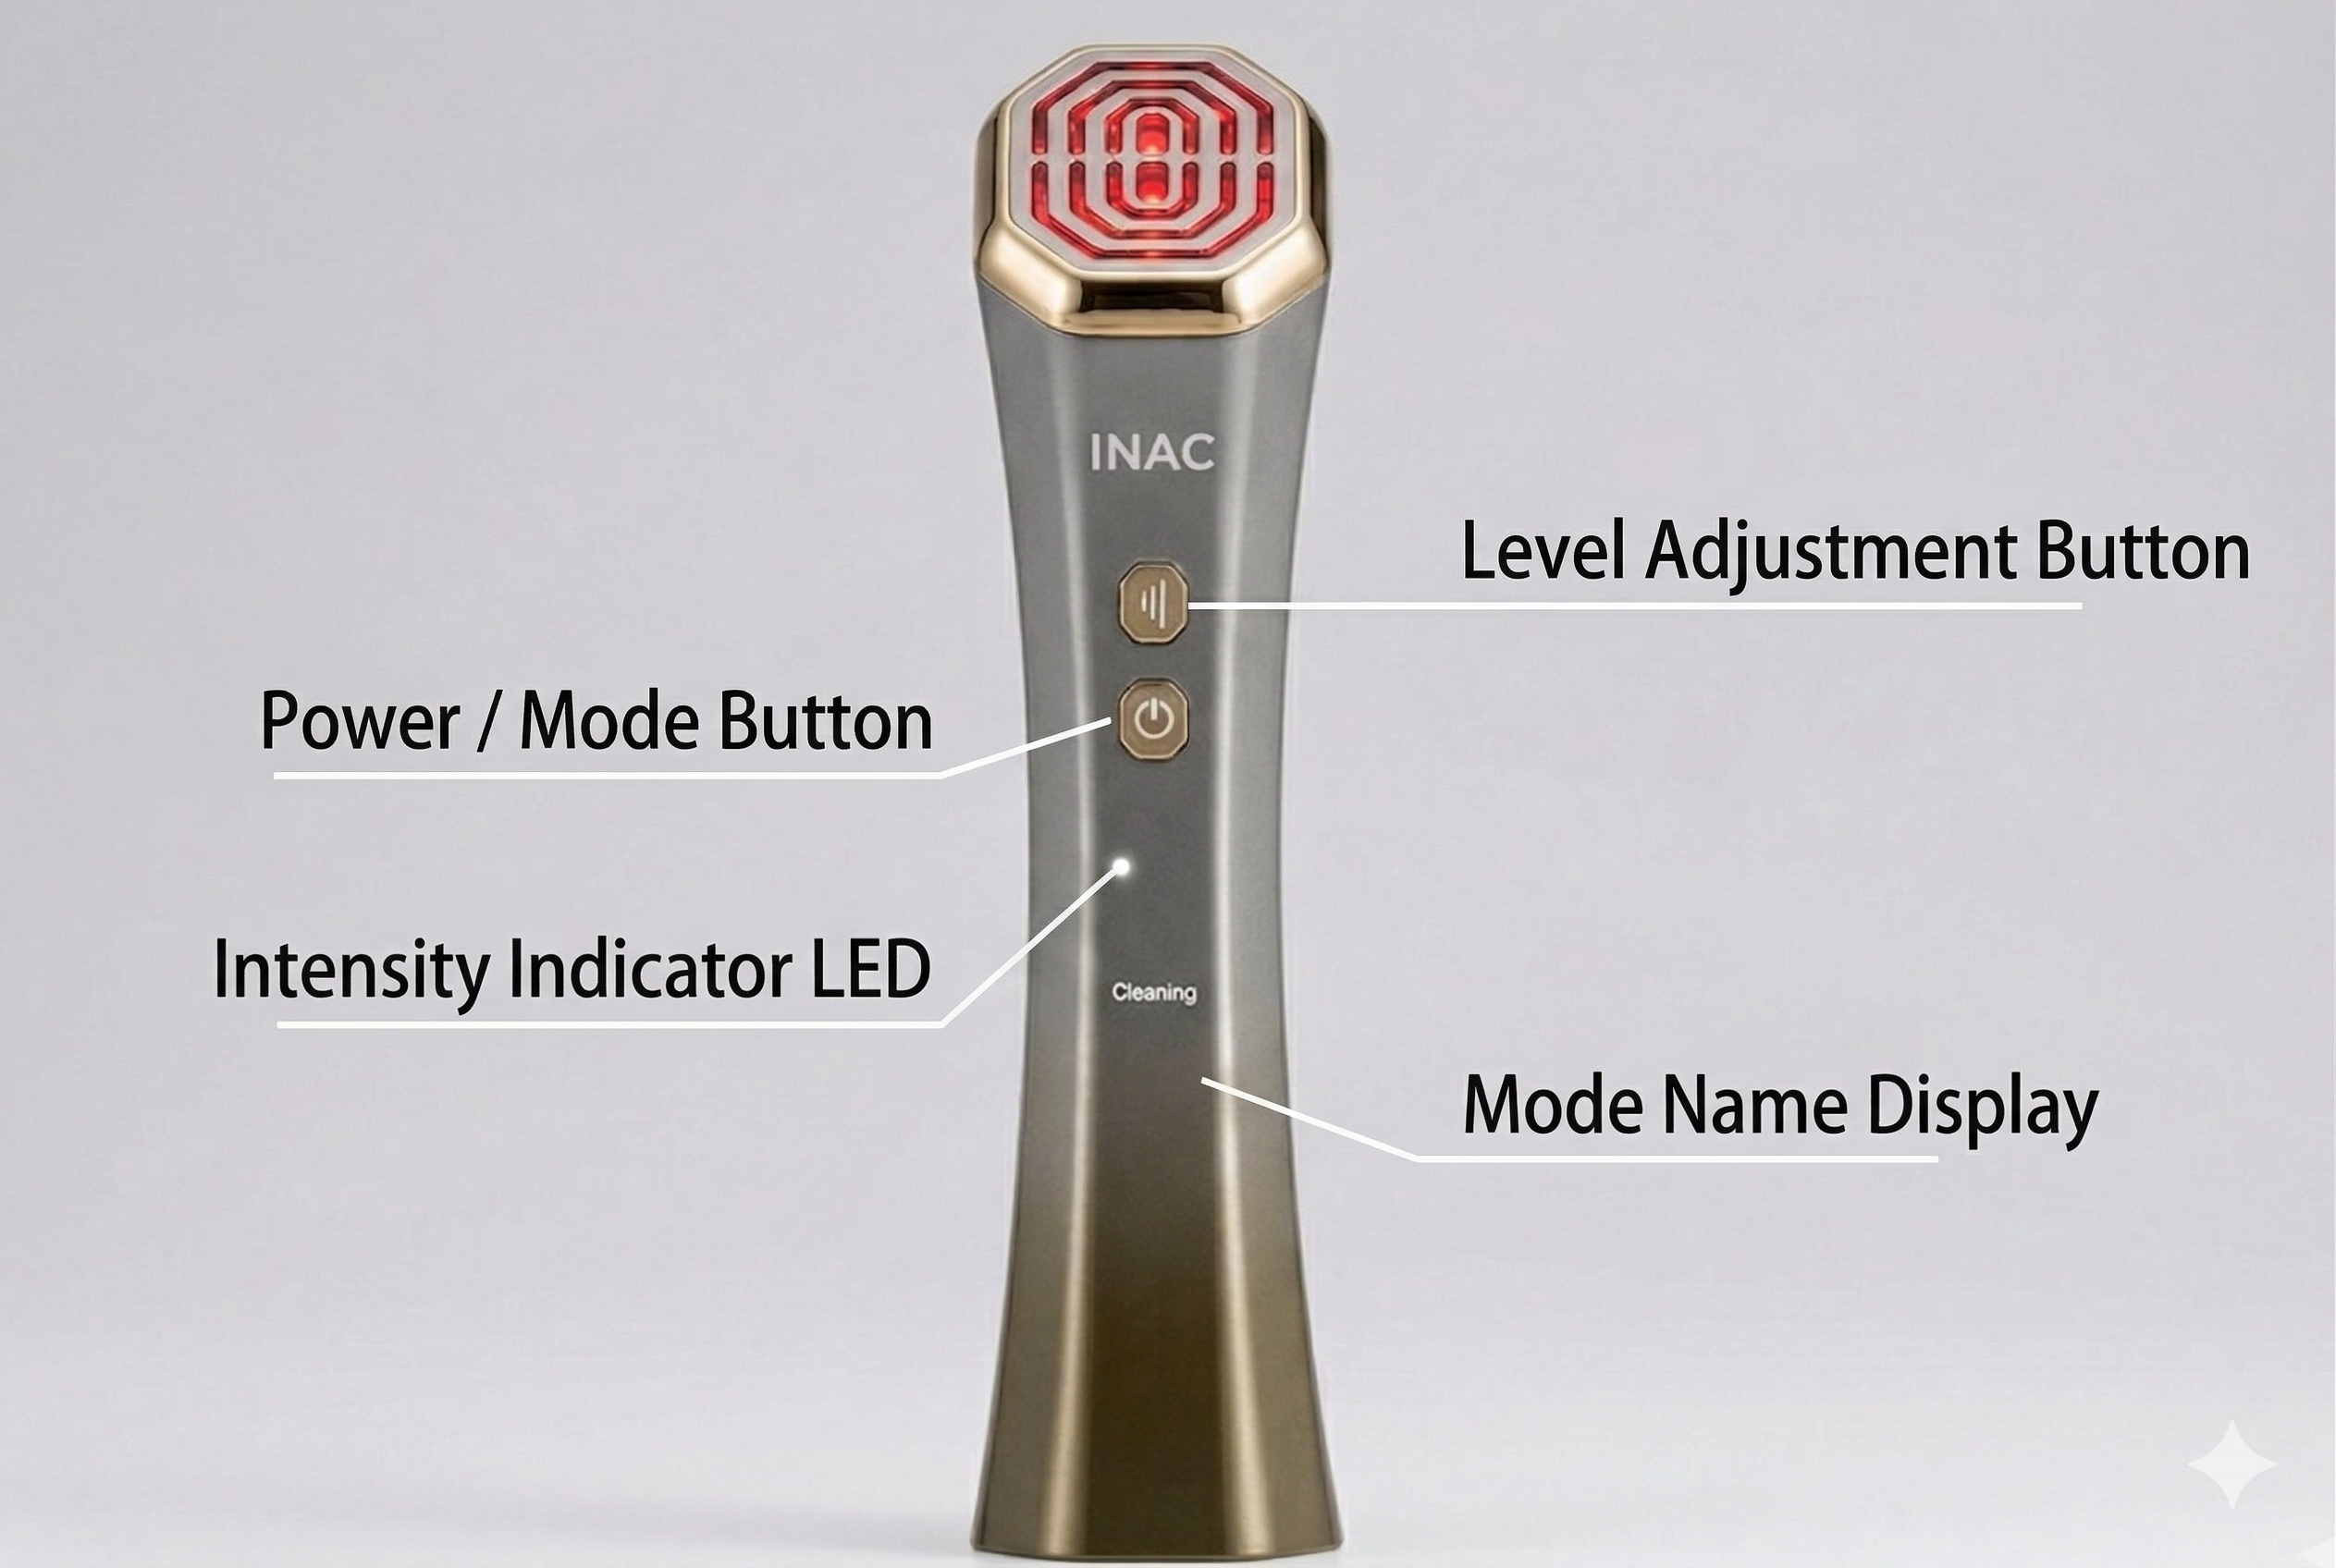
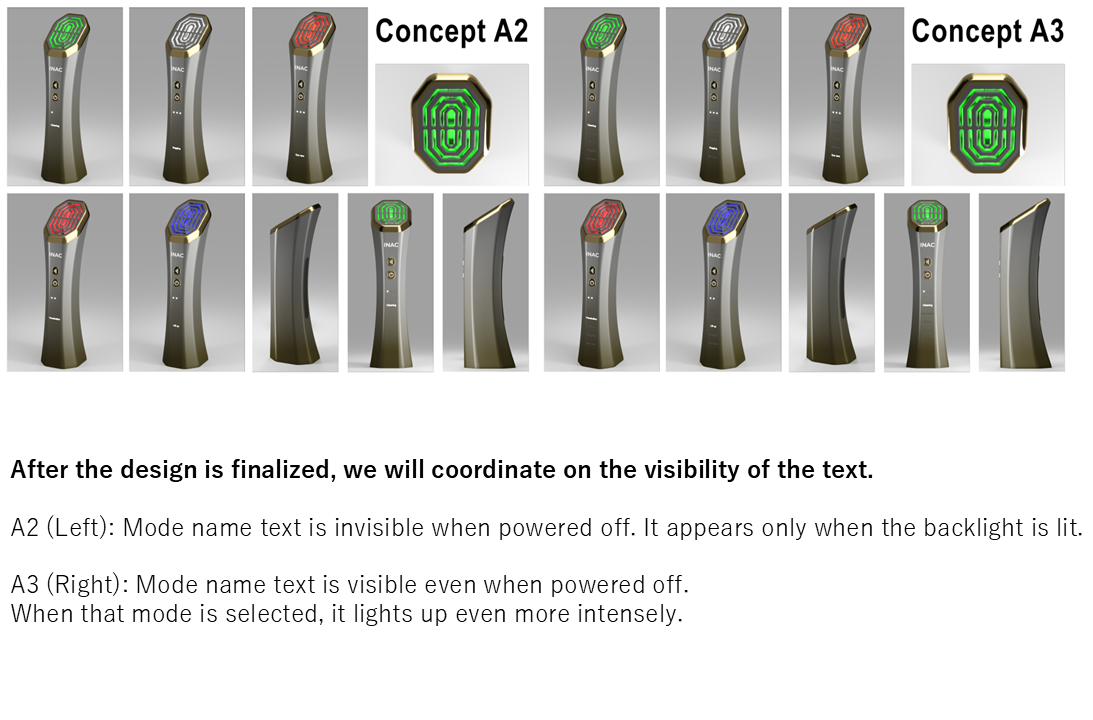
■ Visual Excellence: “Dead Front” LED Effect
Our greatest focus is on the “invisible” logos and indicators that remain hidden when the power is off. Using our proprietary translucent coating technology, vibrant text and symbols emerge the moment the power is turned on. This sophisticated decorative control—revealing elements only when intended—significantly elevates the product’s premium feel.
Use Cases
Exhibitions & New Product Launches: For high-impact demonstrations.
Executive Presentations: To facilitate final decision-making.
UX/UI Validation: Early-stage verification of usability.
Pre-launch Marketing: For high-quality photography for catalogs and websites.
A quality inspection is performed. At INAC, where quality comes first, we use CMMs, gauges, and other equipment for precision checks.
STEP4: Post-Processing and Finishing
Finishing is done by removing the supports, polishing, and applying transparency treatment. It is also possible to paint and apply plating to the formed product.
STEP3: UV-Laser Print Formation (SLA Process)
Output: The product is formed by irradiating the liquid with a laser beam of UV light and laminating it. The conditions of the external environment, such as room temperature and humidity, must be maintained.
STEP2: Model Program Generation and Support Adjustment
A program for model formation is created. Depending on the shape, it may be necessary to adjust the degree of tilt and the position of the supports.
STEP1: CAD File Submission
Upload your CAD to our online quoting platform.
STEP 3: Rendering and Scene Integration
We can also handle exterior modeling and interior structure design based on illustrations.
After creating the 3D models, we can create a rendering to fit a scene. We can deliver images even if we do not proceed with production.
STEP 2: Detailed Design and 3D Modeling
Once the design is determined, drawings and 3D models will be created.
The structure will be examined, taking into consideration not only the external design but also functionalities such as mating and sliding.
STEP 1: Initial Design Consultation
The first step is a meeting to discuss the project. Drawings are not required for this meeting. We will create a design from a sketch based on the overall image and concept that you have in mind.
STEP5: Quality Assurance and Inspection
We perform quality inspections. At INAC, where quality comes first, we use CMMs, gauges, and other equipment for precision checks.
STEP4: Post-Casting Finishing
Vacuum casting materials are cured and then taken out of the silicone rubber mold. Then we perform finishing such as deburring and gating, and they are made into finish products.
STEP3:Material Injuction
Liquid casting material is injected into the silicone rubber mold in a vacuum environment.
STEP2: Mold Preparation
The silicone mold is cut open into a male and female mold, and the master model is removed.
STEP1: Mold Creation
The master model is fixed to a wooden frame and silicone is poured to create a mold.